how to select what youve outlined in pen tool
The pen tool is not just a pen. It can do more in Photoshop. We can say that the Photoshop Pen Tool is the most powerful tool in Adobe Photoshop and Illustrator. You lot can create various shapes and duplicate them using the Photoshop pen tool.
The Pen tool can make whatsoever selection with accuracy than whatever other option tool. Information technology is a perfect tool for removing background from any object. It works through vector mathematics. Then, the objects never become blurry if you lot increase or decrease their size.
Today we will learn about this important tool. In this article, we will guide you to be a master at Photoshop Pen Tool.
Some Basic use of the Pen Tool
Photoshop Pen Tool allows us to create paths and shapes. It is a unique selection tool. You can change, salve, and reuse the paths and shapes that you created with the Photoshop Pen Tool.
Removing Background from any paradigm is another great work of the pen tool. You lot tin remove the groundwork and use whatever custom groundwork in your product image with the pen tool. Yous can also select a office of an image to change its color.
With the photoshop pen tool, you lot tin draw accurate paths around the images. So, we need the pen tool for all this of import task in Photoshop. So, why not main the Pen tool from the beginning? Let's discover out what is a pen tool, where it is, and what it does.
Where is the Pen Tool in Photoshop?
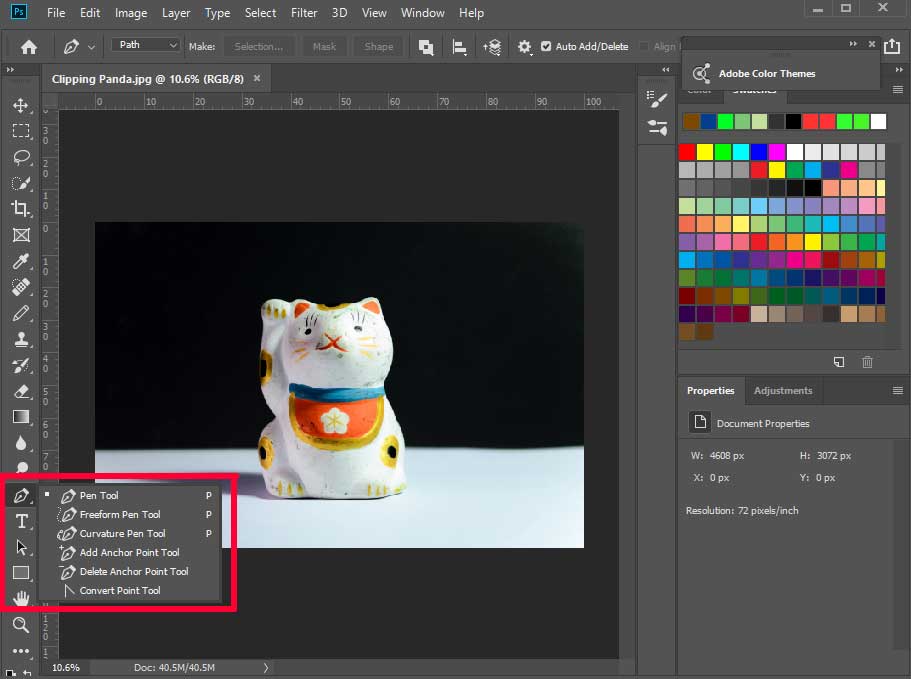
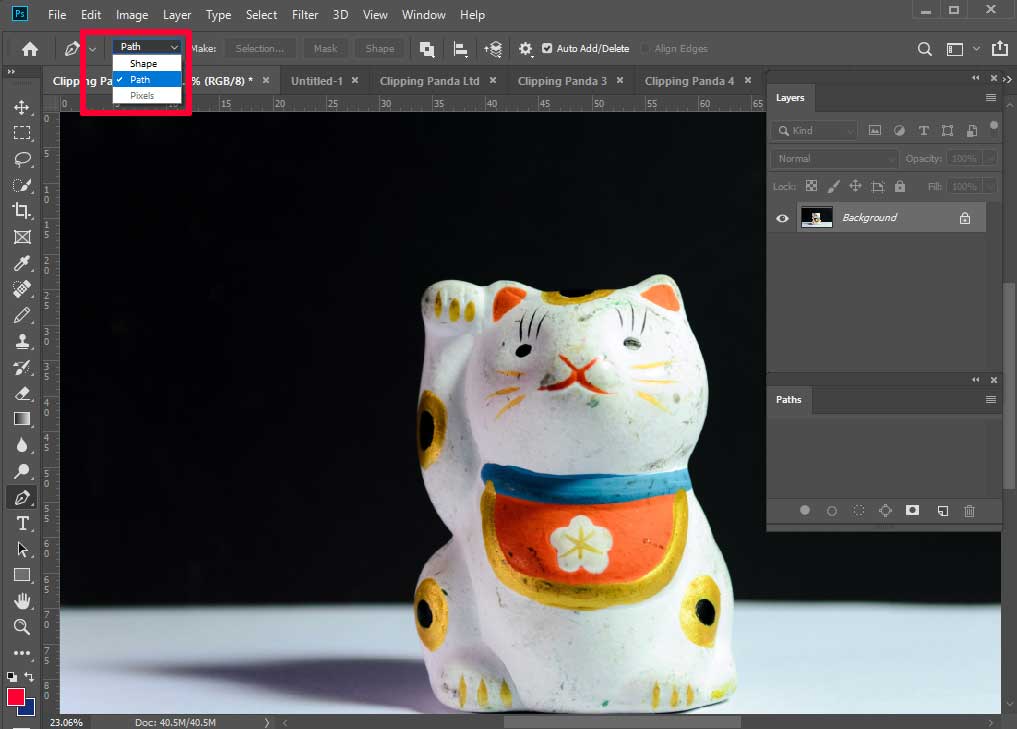
The Photoshop Pen tool is in the lower half of the toolbar in Adobe Photoshop. In Adobe Photoshop cc 2018 and 2019, the pen tool has six different options. If you are using the older version of Photoshop, then you will see only five options. Among the pen tool options, the beginning three are for adding a new anchor point. And the rest is for converting or modifying the anchor points. When yous right-click in the pen tool, you should run into the following options.
- Pen Tool
- Freeform Pen Tool
- Curvature Pen Tool
- Add Anchor Betoken Tool
- Delete Anchor Indicate Tool
- Convert point Tool
But what is ballast points? When we will apply the pen tool, we will make dissimilar points in the object to make paths or outline. Nosotros accept to make a straight or curved line between two anchor points.
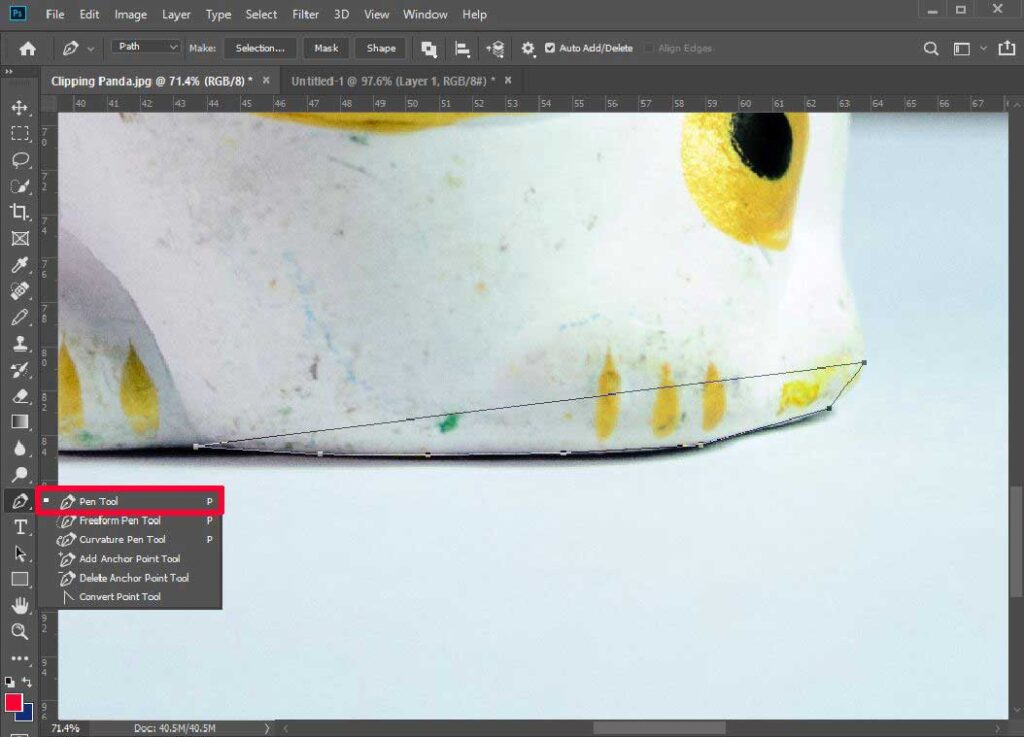
The Pen Tool
With the standard pen tool, you can create smooth paths or selections. By placing several manual anchor points with it. The capital "P" is the shortcut for the Pen tool. Whenever you want to use this tool simply blazon P to go dorsum on it or you can merely click with the mouse from the toolbar.
Freeform Pen Tool
The freeform pen tool allows you to brand paths past clicking and dragging the mouse. You only have to draw the mouse and drag like sketching with a pencil. Information technology doesn't make accurate path all the time. You have to alter and refine the paths subsequently creating.
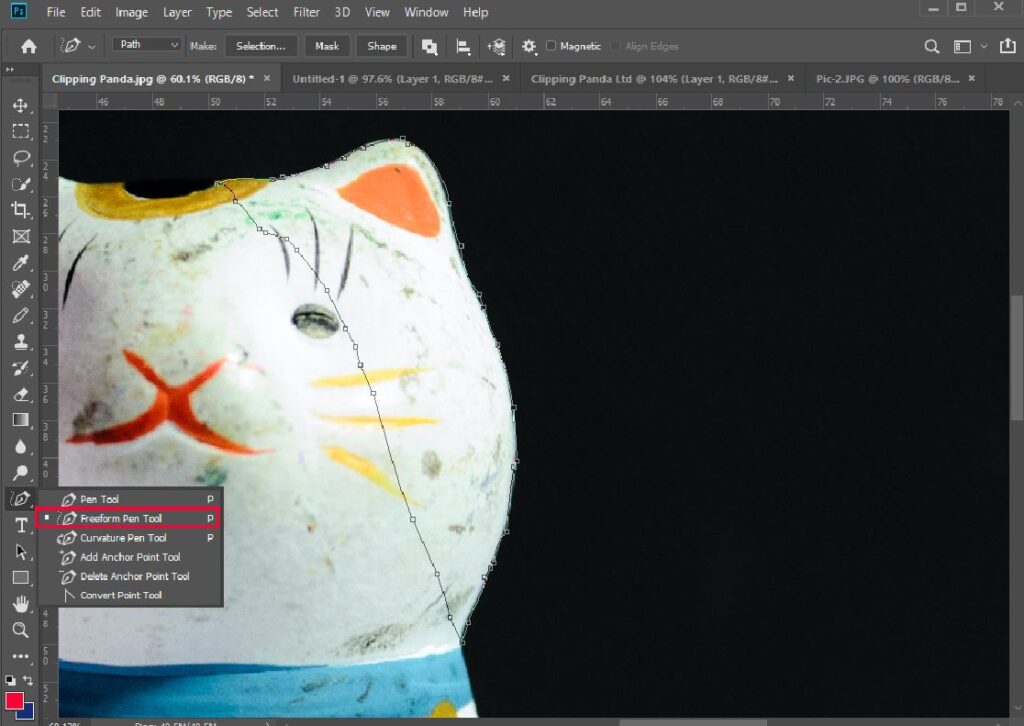
There is some other keen pick that comes with the freeform pen tool. When yous activate it, yous will see a magnetic tool pick at the top options bar of Photoshop. By activating the magnetic option, you draw a polish and accurate path with the free form tool. In that instance, you lot just have to click the mouse to make anchor points. It will automatically create a path for yous.

Curvature Pen Tool
When y'all have to select a bend part from the object you volition need this tool. Curvature Pen tool helps to make accurate anchor points in the curve areas. It as well works like a circumvolve.
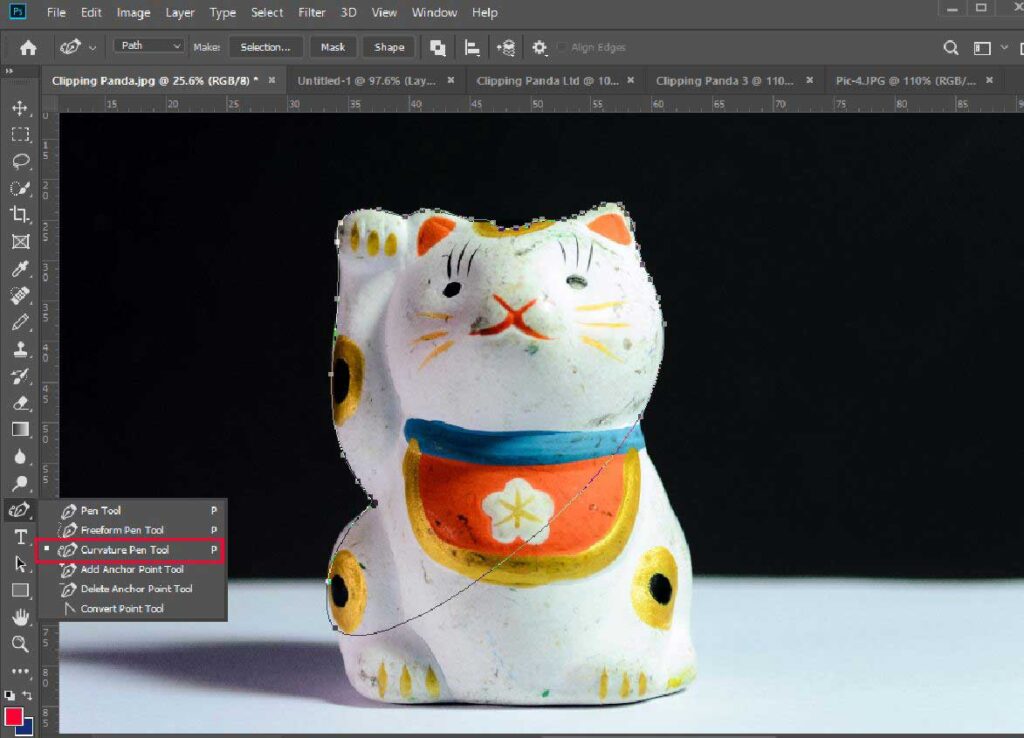
Generally, the standard pen tool is best for any selection. Information technology is the most versatile tool for all selection. And with the other tools, you can easily change and convert the anchor points.
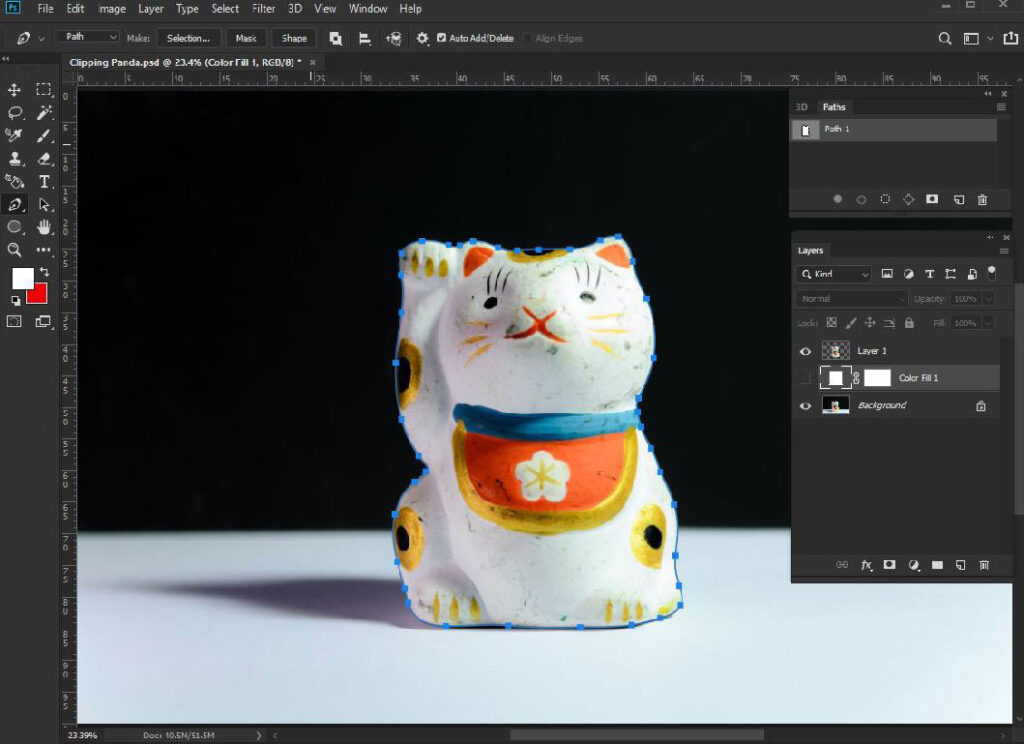
Creating a Path with Photoshop Pen Tool
Nosotros volition employ the standard Pen Tool to create a new path around the object. With the Pen Tool, we will able to create a shine and authentic path. If it is your first time, yous may find information technology hard. But don't lose hope in the first place. Later on some do, you volition observe fun to create a path with the photoshop pen tool.
Before starting to draw the path, use keyboard shortcut P to select the Pen Tool. And so select the path selection from the option bar at the top of Photoshop.
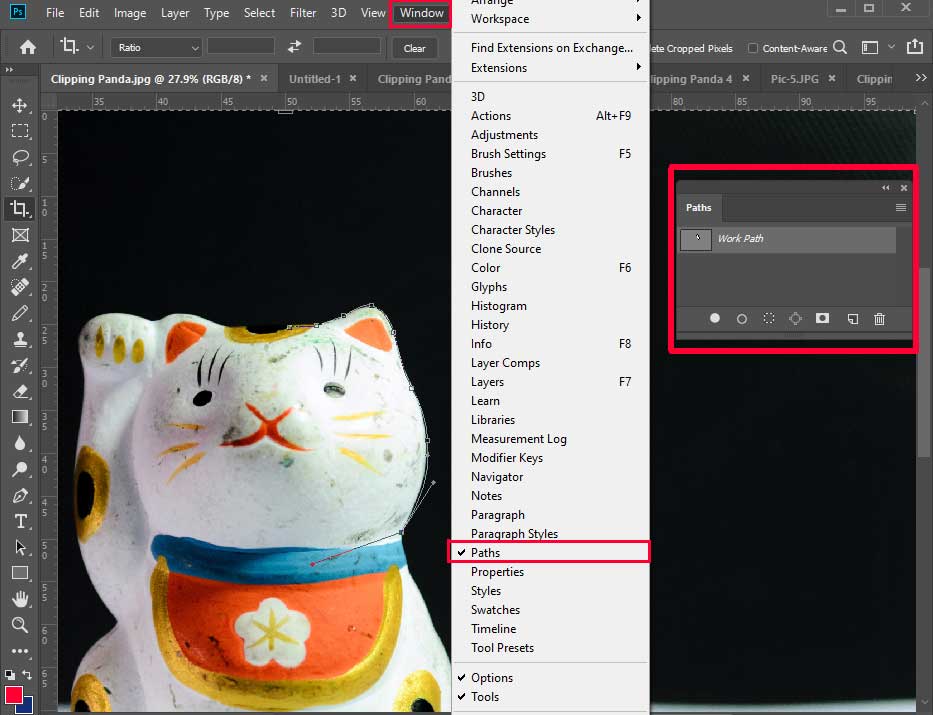
At present commencement drawing the path around the photo. You volition encounter the paths on the right side of Photoshop under the layer box. If you don't see the path box, go to the window and so choose the Paths option. You can besides move the path box wherever you want.
Click on the paradigm with the mouse where you want to start drawing the path. You can get-go from the simple border of the image to continue things simple. First, depict straight ballast points and go on. In the curved area, y'all can use the curvature pen tool.
To get exact anchor points zoom in the photograph by pressing Crl+Space. You tin navigate the whole sheet belongings Space and dragging the mouse. To undo whatsoever activity, press Ctrl+Z. Thus, you tin get back to the previous anchor point and draw again.
To adjust anchor points, yous tin can break the handles by pressing the Alt fundamental. With pressing the Alt key, you can prepare, delete, or adapt the ballast points. Close the path by placing the stop anchor point to the first anchor signal. Later on Endmost, the path is now complete.
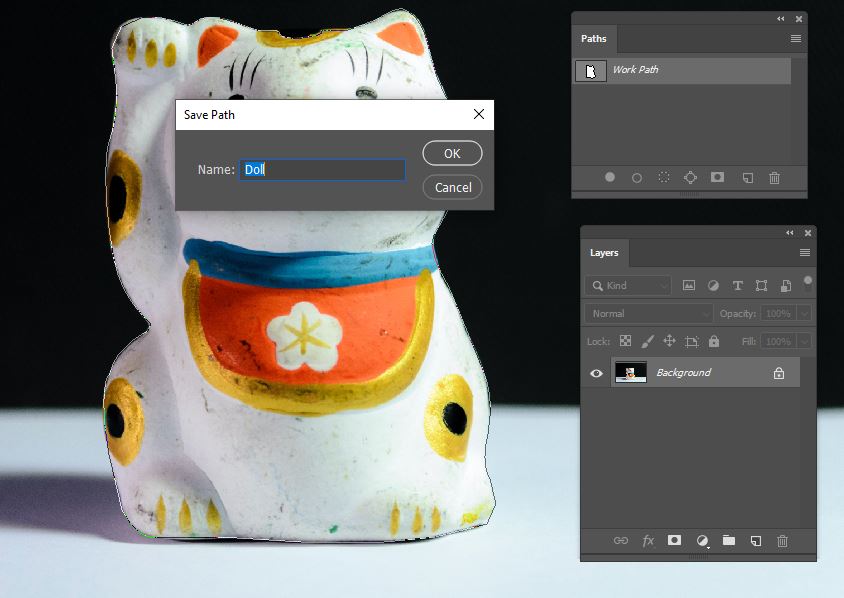
Saving the Path
Saving the path is the most important work. An accident can happen at any fourth dimension. So, if you don't relieve the path, it is possible yous may lose information technology.
Go to your paths panel to save the path. There you will find a new work path. You can rename information technology past double-clicking and save it.
Creating a selection from the Path
Subsequently saving the path click to select it in the paths panel. You lot will see a dashed outline circle icon at the bottom of the path panel. Click the icon to select the path. There is some other choice for selecting the path. First, select the path in the Paths panel. Make sure the Photoshop Pen Tool is selected. At present, choose the selection from the option bar beside the Make option at the top of Photoshop. Later that, a driblet-down window will appear. There, give the feather radius .five and then press ok.
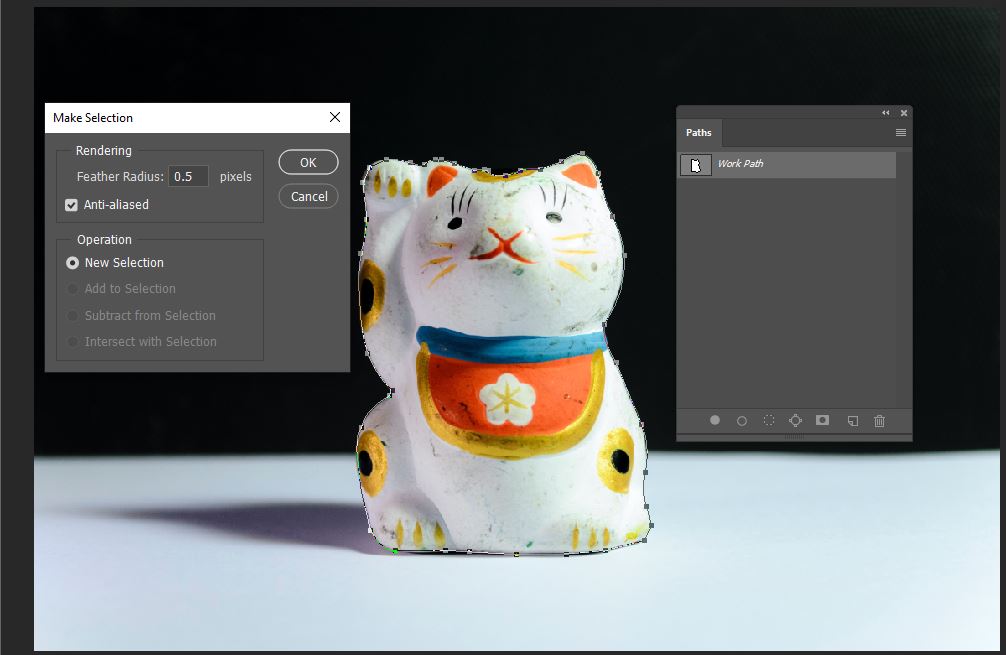
If you are trying to isolate the photo from the background, you lot should go on the feature radius 0. Now the selection of your path is consummate.
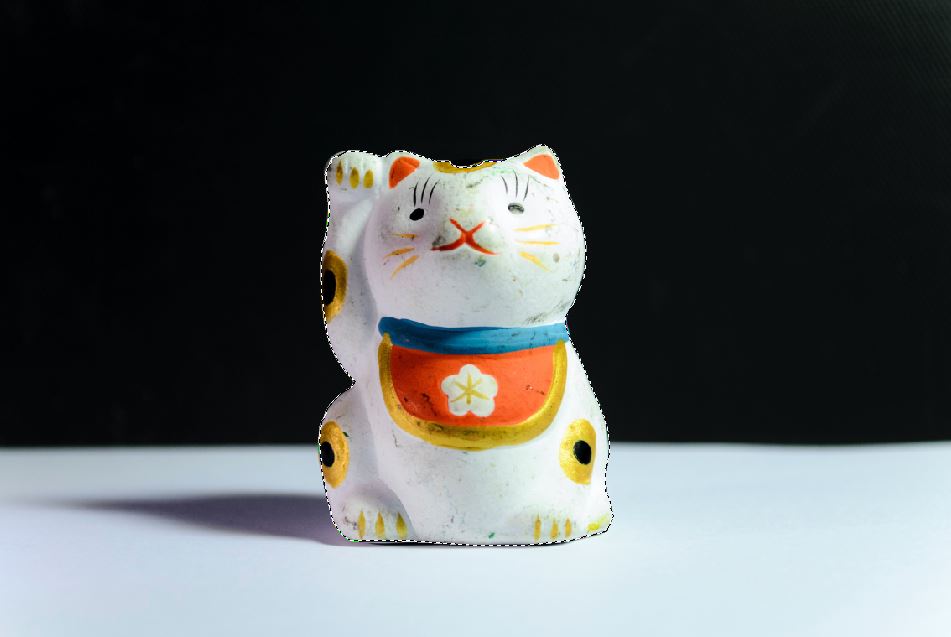
Removing the Background
After completing the selection, you tin remove the background in two different ways. If you want to isolate the prototype from the background, you can do it past copying the pick into another layer. Or you can create a layer mask to remove the background.
Re-create the selection by pressing Ctrl+C. Then press Ctrl+V to paste it. Then you will encounter a new layer containing your option. Now turn off the background layer to remove the background. At present removing the groundwork is consummate with copying the selection.
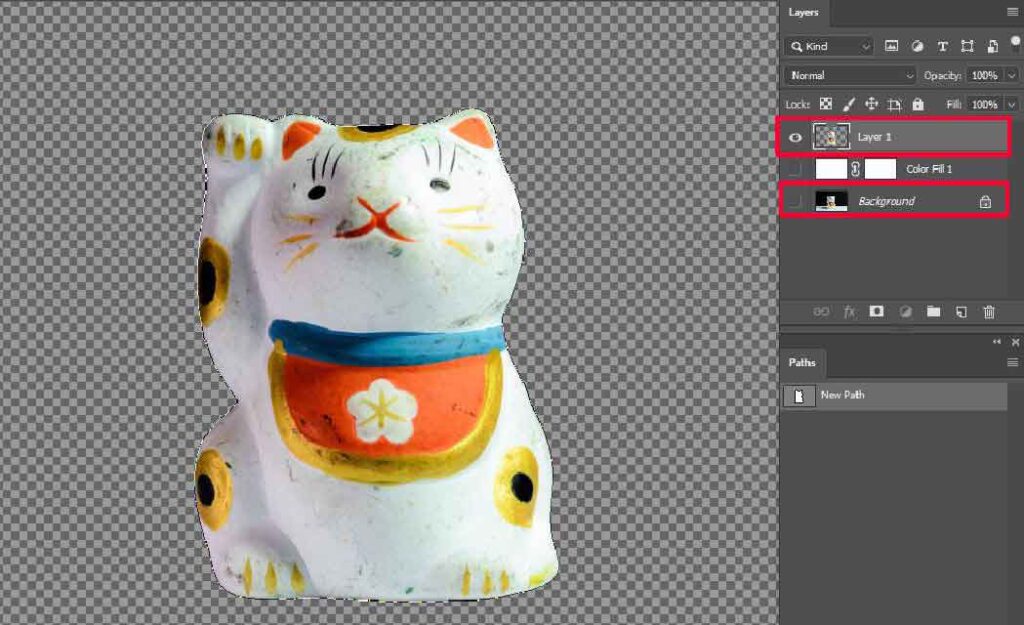
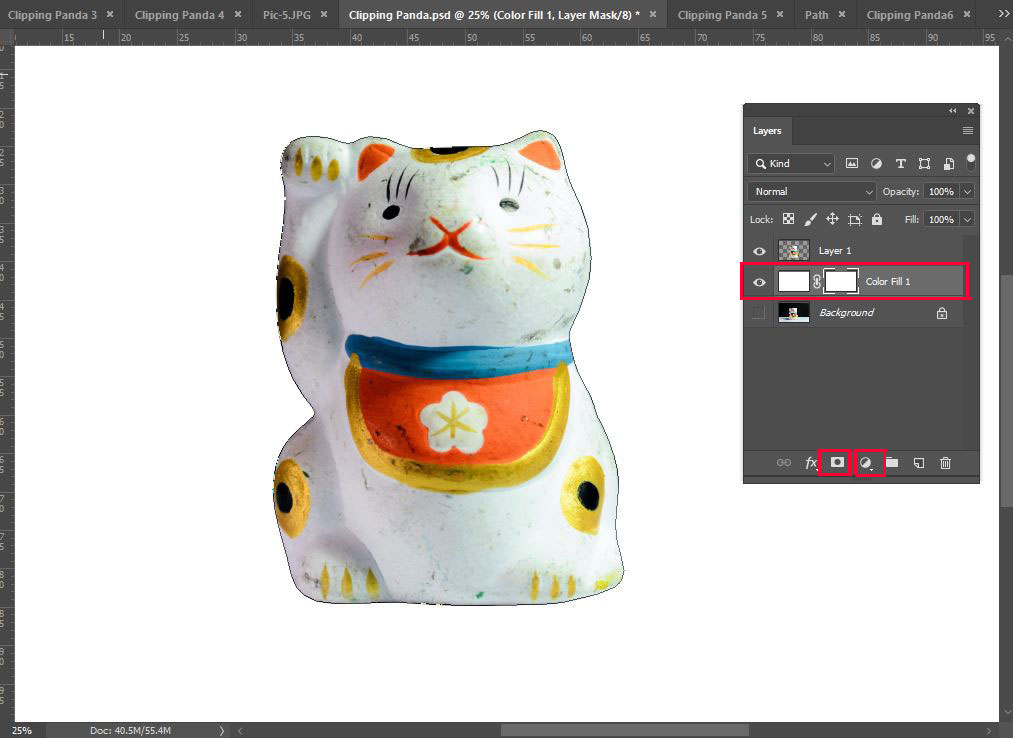
You can also remove the background more than accurately past creating a layer mask. To practice that, click the Layer Mask icon at bottom of the layer panel with selecting the background layer. The icon is a white rectangle with a black circle in it. After clicking it, you will see the automated Layer Mask. At present you can alter the groundwork color that you want. Image masking in Photoshop need this technique.
Besides this, you tin can make your own shape with the Photoshop Pen Tool. And then you can transform the shapes every bit y'all want. Thus, the Photoshop Pen Tool helps us to dispense the images as our requirements.
Determination
The Photoshop Pen Tool is an amazing tool to manipulate any images in Photoshop. Information technology made photograph editing easier. Mastering the Photoshop pen tool takes time and practice. So, if you lot spend enough time mastering the pen tool, you lot can exist an expert in a few days.
Simply, if you lot need urgent Photoshop services, y'all can hire experts. Here at Clipping Panda, we have a team of expert graphic designers. Our team uses the Photoshop Pen Tool with 100% accurateness.
What is a pen tool?
The Pen tool allows us to create anchor points for selecting an image part. We can remove the groundwork, make whatsoever shape, and do more with it. Information technology is a unique tool for photograph manipulation in Adobe Photoshop and Illustrator.
How to zoom and move the sheet at the fourth dimension of creating a path?
When creating a new path, use Ctrl+Space to zoom the image. And Press the Space bar and drag the mouse to move the canvas.
What is Layer Mask?
Layer masks allow u.s. to dispense photos such as background removal. They change the opacity of the layers. To create a layer mask, select a layer in the Layers panel. In a simple word, layer masks make the hidden layer transparent.
Source: https://clippingpanda.com/pen-tool-in-photoshop/
0 Response to "how to select what youve outlined in pen tool"
Post a Comment